Offensive linemen need to be balanced at all times. The stance provides stability and power against a defensive lineman. If a player is not in a proper position to move effectively after the snap, the rest of the play could be affected.
This article will detail the proper stance for an offensive lineman to maximize efficiency and protect the quarterback.
Offensive Lineman Stance
Offensive and defensive linemen have different stances because they both need to be able to do different things.
Defensive linemen, for example, need to be able to move forward at a very high rate of speed.
Offensive linemen, however, need to be able to move in a 360-degree radius with balance and precision. This is why the two stances are different.
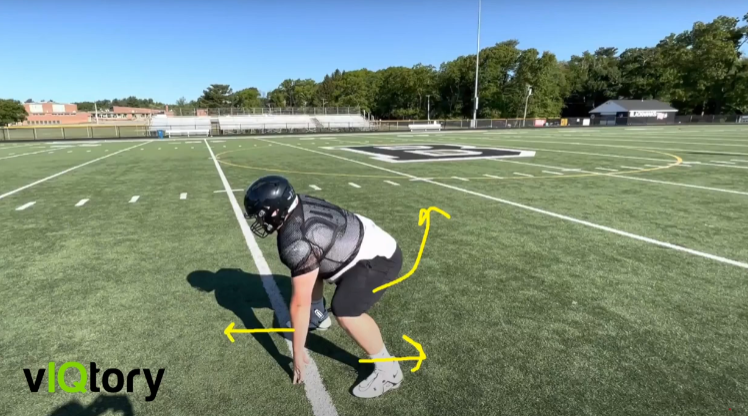
Offensive linemen will change between a 3-point stance and a 2-point stance.
In short, in a three-point stance, the players will have their knees bent, toes directly ahead, and three forward fingers on the ground. This is where the 3 points come in (2 feet and 1 hand on the ground).
You don’t want to tip off if it’s a run, on obvious running downs. Everything should look the same on every down.
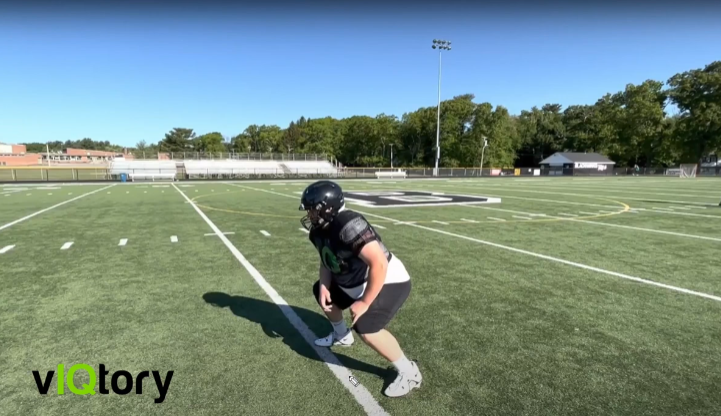
In a two-point stance, you don’t want too much weight going forward or backward, but rather a balanced, coiled-up stance. Keep the chest level down as you don’t want to tip any off in obvious passing situations.
The four-point stance isn’t needed for offensive linemen unless it is a short-yardage situation and your coach needs you to get low.
Many power-running teams use the two-point or three-point stance.
Depth
Many offensive linemen have trouble identifying how low they need to get in their stance.
Some get too high in their stance because this position feels more comfortable. As a result, they do not have proper leverage or generate maximum force coming off the ball.
Others have the coaching cue low man wins ingrained in their head, and as a result, they get so low that they have to raise post-snap or lose the ability to move effectively coming out of their stance.
This is one of the more difficult areas of the stance to coach because there is no single answer. Every athlete’s body is built differently, and, in turn, the depth of every stance will vary slightly.
An effective way to determine the proper stance depth is to start in an athletic position with your palms on your front hip flexors.
Start to push your hips back and sink your butt with your hands, naturally moving down your quads and eventually passing over your knees.
Once the angle of your wrist folding over your knee and the knee bend angle naturally match, you are at the proper depth. If a space develops between the wrist and knee, you are too low.
Hip Alignment
Hip alignment is crucial to gaining ground toward your landmark from your stance, regardless of the play.
If your hips are in proper alignment, you have to change the amount of force through your drive leg and adjust the angle of your course with your catch leg to get to where you need to be, rather than changing your stance depending on the play.
Your hips will follow your knee, which also tends to follow your foot, so proper knee and foot position will dictate your hip alignment.
First, both feet should be slightly outside of shoulder width, creating a sturdy “A-Frame” base.
Starting with your inside leg closest to the ball, this foot and knee should be pointing directly toward the line of scrimmage.
With your outside leg, bring the outside foot back with your toes aligned to the halfway point of the opposite insole of the inside foot.
Next, turn the outside foot to a 45-degree angle. This will allow for a proper pass set with that foot, taking you on a 45-degree angle in your set.
However, if you stay in this position, your hip will flare open, causing your gate to open in a pass set, and not enough force will be generated to move effectively when moving inside in the run game.
To get the outside hip in a proper alignment, the athlete must pull their outside knee back into a neutral position, getting as perpendicular to the line of scrimmage as possible.
Weight Distribution
This stance area tends to be an issue for younger offensive linemen, but it still applies to all levels.
When thinking about weight distribution, the number one thing to remember is the offensive line stance. A defensive line stance is drastically different, as the movement required by the two positions is also significantly different.
First, weight should be evenly distributed between the heels and feet. It is important to have the entire foot or “every cleat in the ground.”
If your entire foot is not in contact with the ground pre-snap, it is tough to get it there post-snap, and if you can get it there, it is wasted movement.
The larger the surface area generating force through the ground, the more power will be generated, allowing you to move the defender.
The other big point to focus on with weight distribution is the ability to pick up your hand in a three-point stance. There should be no difference in weight distribution between a two-point and a three-point stance.
The only difference between the two is simply placing the outside hand on the ground.
An effective way to see if a player has too much of a forward lean or unequal weight distribution out of a three-point stance is to pull them down and hand out from under them in their stance.
If they fall forward, they need to shift their weight back.
Center Stance
The center has a slightly different stance as he is aligned directly over the ball. There is no inside or outside foot to refer to, nor do they have the ability to drop one foot slightly behind the other.
The goal for the center post-snap is to essentially turn into a guard, depending on which direction they are moving. The center must slightly open both hips as a guard would with his outside leg to do this effectively.
To do this, start in the same athletic “A-Frame” position with both feet parallel to each other.
Then pull the toes up and rotate on both heels until both feet slightly point out for the hips to turn into a slightly open position. This allows the center to effectively pass set in either direction or generate upfield or lateral force in the run game.
The same depth and weight distribution rules appl,y with the center simply resting his hand on the ball to snap it.
Join 500+ Football Coaches Improving Their Skills

Read these offensive lineman articles next to keep learning:
How To Play Offensive Line In Football – Complete Guide
How To Snap A Football & The Different Types Of Snaps
Get Your Free Practice Template
Choose your high school or youth practice template below to start running more organized practices.