Understanding how to break down film and game plans is one of the most important skills that any football coach can have.
Unfortunately, most coaches will watch football film like a fan. Studying only the big plays, not the intricate details of each player.
Practice Film
First, if you’re not filming your practices, you need to.
It doesn’t need to be high-quality film, you can use your phone, or an old iPad, or even buy a cheap $60 camera off Amazon.
Regardless, you should always film your practices so that you can see what you may have missed during the live practice. This also allows you to get more reps in during practice, as you’re not micro-coaching every small fault.
In addition, players often learn better through visual examples. If you film your practices, you can show your player exactly what they missed and talk through their faults.
Practice films should be filmed in segments. We recommend having 3 different practice types:
- Individual periods – this is the phase where you can slow things down for the player and teach them the raw fundamentals.
- Group periods – Start introducing the technique in a semi-live scenario, where players can get a feel for what they learned during the individual period. A good example of this is 1/2 line drills with offensive/defensive linemen or 2/3 man coverage drills with wide receivers and defensive backs.
- Full team periods – Use these live scenarios to replicate exactly what you want to see on game day.
When you’re breaking down practice film, every step, hand placement, and alignment matters.
If it doesn’t look good in the individual periods, it won’t look good during group and team periods. This allows you to correct it when watching the film with your players.
Get Your Free Practice Template
Choose your high school or youth practice template below to start running more organized practices.
Breaking down game film can be extremely overwhelming if you don’t know what you’re looking for.
We’re going to take a look at the offensive game film breakdown and the defensive game film breakdown.
Breaking Down The Opponent’s Offense
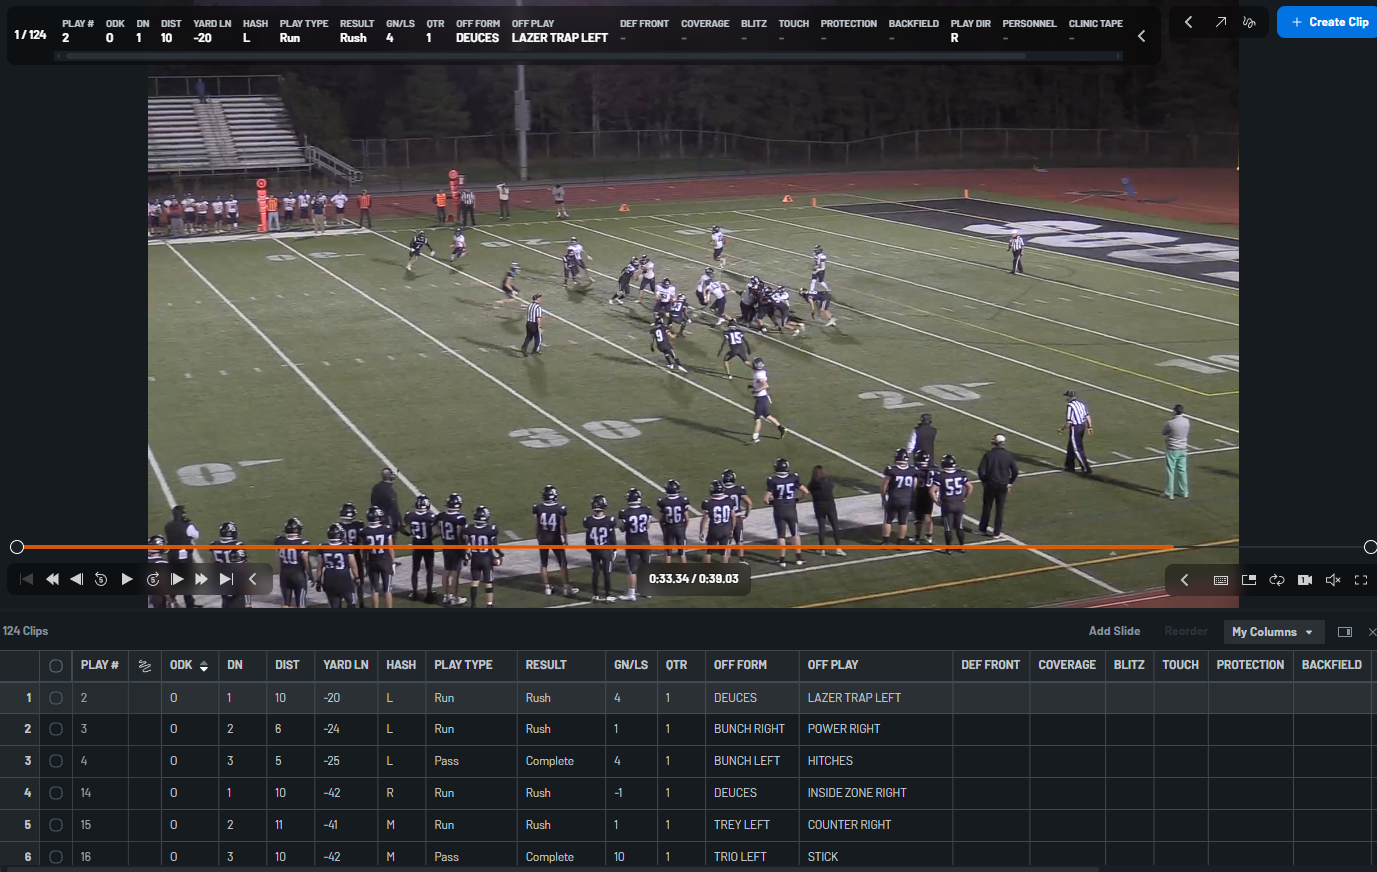
Football is a game of tendencies. Good coaches are aware of their tendencies and try to break them every game. However, a good amount of coaches do not self-scout, so we can take advantage of both player and coaching tendencies.
If you use Hudl, it’s extremely easy to see your opponent’s tendencies through data. I did a whole video for Hudl, breaking down how to use their system here.
Down & Distance
When watching the film, the first thing you should look at is the opponent’s tendencies to certain down-and-distance situations. Look at:
- 1st & 10
- 2nd and Long/Medium/Short
- 3rd and Long/Medium/Short
- 4th and Long/Medium Short
Collect data on how the opposing coach handles these situations. Are they super pass-heavy on certain downs and run-heavy on others?
Formation Tendencies
Formations are among the biggest indicators of a team’s tendency.
Remember, offenses are similar to an orchestra. Everything is timed up to hit perfectly. If something disrupts the offense’s timing or structure, the defense typically will win that down.
When you’re entering information about the opponent’s offensive formations, make sure your entire staff knows what you’re calling each formation.
For instance, if we get a 2×2 set with a pistol back, our staff knows that we call it “Pistol Deuces”. Universal language helps us all identify formations on the fly.
Once you have labeled all of the opposing team’s formations, start to look at:
- Run or pass tendencies from that formation
- Types of plays that are run from that formation
- Direction of the play
- Do they run the play to the field or the boundary?
If you spot any tendencies in certain formations, teach your players what to expect when they come out in that formation. This is how your defensive backs can visualize receiver spacing and anticipate route breaks.
Play Tendencies
Once you spot formational tendencies, start to hone in on what plays are run from that formation.
This will give you a clearer picture of what defenses to call against those formations.
For example, if the team you’re playing only throws the ball when they line up in a spread formation, it might be advantageous to drop 8 players into coverage.
Similarly, if you notice that the other team struggles against the blitz on 3rd down, mark it down as an area to be aggressive in.
Player Tendencies
The last thing to look at is player tendencies. Remember, players are chess pieces in the game of football. They are a direct reflection of their coach. Some coaches are strict about technique, and some only care that the job gets done.
Because of this, we can pick up on player tendencies to give us an advantage.
An example of offensive player tendencies:
- An offensive lineman in a 3-point stance is light on their hand – This could mean they are pulling (if it’s a guard) or passing (if it’s an offensive tackle).
- Quarterbacks licking their fingers – most quarterbacks will lick their fingers before receiving the snap. Are they doing this before every play or only when it’s a pass play?
- First/last look from the quarterback – As the quarterback approaches the line of scrimmage, where is the first/last place they are looking? Does that mean they are throwing it that way? Why does the quarterback look where they do before the snap?
- 3-point or 2-point stance – Do offensive linemen line up in 3-point stances during runs and 2-point stances during passes?
These are just some of the common tendencies offensive players give off. If your film quality permits, see if you can study individual opponent tendencies to get an advantage on a play.
Quarterback Throw Tendencies
To break down quarterback tendencies, we use a launch chart.
This chart is great for breaking down many things, such as:
- Who is the quarterback’s favorite target?
- How long does it take for the quarterback to throw the football, on average?
- The location in the pocket where the quarterback is throwing the football?
This chart will help you decide whether you should blitz the quarterback or drop 8 into coverage.
Download The Free Launch Chart Here
If you have any questions about the launch chart, let us know. We’re happy to help.
Breaking Down The Opponent’s Defense
At the youth and high school level, defenses are more stagnant and less dynamic than offenses. The main reason is that it’s a lot harder to teach gap control, schemes, and various coverages in such a short amount of time.
Because of this, offenses can exploit the opponent’s defensive schemes.
Defensive Fronts
The first way to break down film is to look at the defensive front. What is the other team trying to accomplish with their defensive fronts? Ask yourself these questions:
- Are they a 4 down or a 3 down front?
- Do they slant their front or are they gap control?
- If they slant, are they slanting to the field or the boundary?
- Do they stunt?
- Where do the linebackers typically play, and how aggressive are they?
Keep track of these alignments throughout the game and note what you have to prepare for. If you’re not familiar with defensive alignments, we recommend you read this blog to learn how the defense lines up.
Defensive Coverages
Next, once you determine what the front is, what coverages are the defensive playing?
One thing that makes it easier to determine coverages is to split the field in half. Yes, you can determine if it’s two high or one high, but if you teach your quarterback progression reads, it’s easier to split the field in half.
Blitz Packages
How often does your opponent blitz you, and from where?
Teams will often carry 3-4 blitz packages into a game. We recommend diagramming all of the opponent’s blitzes and ensuring you have the protections (whether 6-man, 7-man, or hot protections) to block them properly.
Once you’ve identified all their blitzes, we recommend a blitz pickup period during practice, so your offensive line can mentally prepare for the blitzes they’ll see.
Spill Or Box Edges
If you’re a team that likes to run counter, power, or any gap scheme, you need a plan if the opposing team tries to spill your blocks.
Do you log them into the line of scrimmage? Does your running back know where to go if the hole isn’t there, or is he going to run toward the sideline like the defense wants him to?
These questions can easily be answered by the structure of the defense and by seeing how the defensive ends and outside linebackers play on gap schemes.
Meeting With Your Coaches
Now that you have all of the tendencies broken down, it’s time to distribute the information.
If you have the time and facilities, we recommend having smaller individual meetings rather than a long group session.
Take your receivers in one room, running backs in another, etc., and lay out the expectations for each position.
If you have a smaller staff and don’t have the facilities, cover each topic quickly and to the point. Make sure all of your players have writing utensils and a notebook so they can properly take down notes and refer back to them later.
This should be the first step in installing your game plan.
After you meet with your players, do a walkthrough on the field with them so they know exactly what you expect of them. Then filter into your practice the next couple of days leading up to the game.
Get Your Free Practice Template
Choose your high school or youth practice template below to start running more organized practices.